
How to Clean an Oven and Oven Racks in Canada
Want to learn how to clean an oven and oven racks in Alberta and British Columbia? Ovens are one of the most used appliances in the home, but they can also be one of the most intimidating to clean. Between the baked-on food residue, splattered grease, and greasy racks that seem impossible to remove, it can feel like an insurmountable task. But fear not! We’ve got a few tricks up our sleeve that will help you quickly and easily clean your oven and racks so you can get back to cooking delicious meals.
***Always follow your manufacturers directions on cleaning, cleaning supplies, and self-cleaning cycle as they vary.
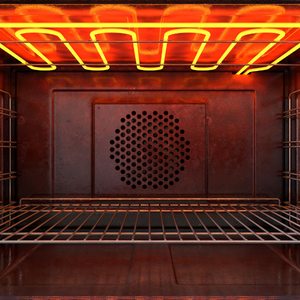
Blue interior is an indication that it is a steam cleaning oven with ceramic coating, do not use oven cleaner.
***This article is for interior cleaning only. Cleaning a Glass Stove Top can be found here.
What You'll Need to Clean the Walls
Before we jump into the how-to, let’s quickly go over what you’ll need to get the job done. For this project, you won’t need any fancy cleaning supplies or expensive equipment—just a few basics that you probably already have around the house. Here’s what you’ll need:
- Warm water (not hot)
- Dawn soap
- Pail
- Oven Cleaner
- Razor Blade
- Pumice Stone
- Plastic Scrapper (possibly)
Cleaning Before Self-Cleaning Cycle
If your oven has a self-cleaning cycle, it’s best to give it a rough cleaning before putting it on self-cleaning mode. This will make sure no fires start, no smoke, and it is easier to get deeper fast. Give it a quick wipe out with a dry or damp cloth till all the large loose debris is out.
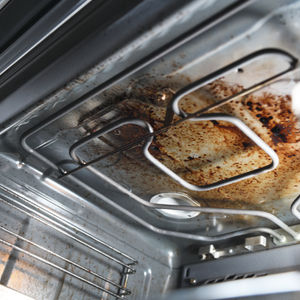
Cleaning After Self-Cleaning Cycle
Once your self-cleaning cycle is finished, use a dry rag or paper towel and wipe out all remaining oven residue from around sides of oven, bottom of oven and inside door. Start by covering both the top element and bottom element (if possible) with aluminum foil or a rag, as this will prevent any oven cleaner from dripping onto them (which is bad for both people and elements). Then pull out both racks; flip them upside down so that only half of each rack is inside the oven. Next, spray every side of the oven (including around where the racks are sitting) with an oven cleaner while flipping each rack over. Pay special attention to any really stuck-on foods or baked-on residue, as well as inside of the door—including any glass panes—and let it rest for about an hour. The racks stay in as you are spraying as they will get coated with the oven cleaner while you are spraying the sides and bottom of the oven. Let is rest for 1 hour and go have some tea. Check halfway through to see if there are any stubborn areas that need retreated; if so, wait another 30 minutes after re-treating before proceeding.
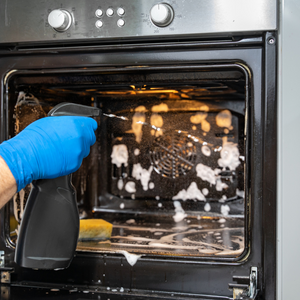
After the Oven Cleaner
Once your oven cleaner did its magic, use a dry rag or paper towel and wipe out all remaining oven cleaner residue from around sides of oven, bottom of oven and inside door. ***Use gloves as oven cleaner is not skin friendly. With a pail of warm soapy water, wash out the inside of the oven to remove even more oven cleaner. If there are any large pieces of food remaining use a razor at 45 degree angle to gentle lift them. Scrub down the racks, glass, and inside of the oven with a pumice stone to speed up cleaning.
Do one final scrub down with warm soapy water till you are satisfied with the job.
Just Cleaning the Oven Racks?
If you are only cleaning the oven racks, not the entire oven, you can take them out and put them somewhere outside (preferably) or in garage with cardboard under them and wrap them in paper towel. Spray the paper towel with oven cleaner till soaked and let sit for 1 hour. Remove wearing gloves and scrub down with a pumice stone. They should clean off very easily. Then wash with warm soapy water to remove the oven cleaner prior to use.
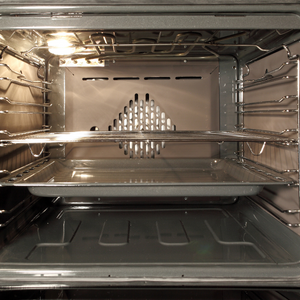
Now you Know How to Clean your Oven and Oven Racks
Cleaning your oven doesn’t have to be an overwhelming task! With just a few simple steps—such as using aluminum foil or rags over top/bottom elements when possible; spraying sides & flipping racks while applying cleaner; wiping out all cleaner residue afterwards; scrubbing tough spots with pumice stones you can easily have your oven looking like new in no time at all! Plus, you’ll have peace of mind knowing that you’re keeping your family safe by removing potentially dangerous build ups from within your appliance! So don’t let cleaning your oven keep you from enjoying delicious homemade meals again—follow these steps today and enjoy worry free cooking tomorrow!
